One thing before we start, and that concerns the firmware (the software used to control low-level tasks) on most modern motherboards. Basically there are two types of firmware: one is the old-style type BIOS (Basic Input/Output System) and the other is the new EFI or UEFI ((Unified) Extensible Firmware Interface). While most of us old fogeys are familiar with the BIOS-type firmware, the computer industry, as a whole, is heading towards the UEFI-type firmware. So it very important for computer enthusiast like me, to fully understand UEFI. There are a lot of documents and articles on UEFI found on the web – but they seems to have one goal in mind – confuse the hell out of the computer enthusiast – and they all have succeeded beautifully. However, not all is lost – there is at least one article at http://www.rodsbooks.com/linux-uefi/ that explains clearly what UEFI is all about. I recommend that any computer enthusiast worth his/her salt, read it and give thanks to Roderick W. Smith, the author – Thank You, Roderick W. Smith. Anyway, the method outlined in this article is based on a UEFI PC (which is a PC with a new UEFI firmware) – however, it is quite possible that they may work for non-UEFI style layouts, although this has not been tested by me.
One more thing before we proceed – I will make the following assumptions regarding both the hardware and software that you are about to use:
- You have a relatively modern PC with a UEFI firmware – NOT a PC with a legacy-type firmware (normally called a BIOS). Note that you can use a PC with both UEFI and legacy capabilities. Just make sure that you either configure the PC to use UEFI only or select the correct method when booting the PC from the boot menu if you decide to use the PC with both UEFI and legacy capabilities.
- You wish to install a 64-bit version of Debian GNU/Linux 8.2 (codenamed Jessie) on it. The choice of graphical desktop environment is entirely up to you, but this article will only describe the Cinnamon desktop.
- The Debian GNU/Linux 8.2 OS will be the only OS on the PC (NO dual-booting!)
- You have a blank HDD or SDD on which you wish to install a 64-bit version of Debian GNU/Linux 8.2.
- You have a 1GB (or greater) USB stick that you will use to create an install boot drive for Debian.
- To avoid the free and non-free issue (for which Debian is famous) and to make sure that proprietary drivers are available during install (especially the network drivers), only the Debian net install + non-free CD iso images will be used to create the USB boot drive (more on this later when you will be given a link for downloading this CD).
STEP 1: Create a Bootable Debian 8 USB Drive On Another PC
First we need to create a bootable Debian 8 USB drive by following the steps below:
IMPORTANT NOTE
The USB stick used in this part will be written over and all existing data will be destroyed. Backup the data if you do not wish to lose all of it.
- You need access to a working Linux PC with Internet connection. Using that PC, open a web browser and go to the following web site (http://cdimage.debian.org/cdimage/unofficial/non-free/cd-including-firmware/). Download the firmware-8.2.0-amd64-netinst iso image to your ‘Downloads’ folder. Note that the size of this image is 280MB so you would require at least a 1GB USB stick to create the USB boot drive.
- Plug in the USB stick into a USB port on the PC and close the file manager if it appears. Launch a terminal and execute:
dmesg
Make a note of the device name of the just-plugged-in USB stick – for example, one line should read as ‘sdc: sdc1’ – which makes the device name in this example as ‘/dev/sdc’. - From the terminal, execute (one by one):
su -
(enter your password)
umount /dev/sdc1
This will unmount the USB stick (‘/dev/sdc1’ used in this example – replace it with the ACTUAL device name as identified by the ‘dmesg’ command). - From the same terminal, execute:
cd /home/(your_login_name)/Downloads
cp firmware-8.2.0-amd64-netinst.iso /dev/sdc
sync
Note that (your_login_name) is your actual login name and ‘/dev/sdc’ (used here as an example) is the USB disk name NOT the partition name. Make sure you replace it with the ACTUAL disk name as identified by the ‘dmesg’ command. The process of copying may take a while to finish – wait for the prompt to re-appear. The ‘sync’ command is to ensure that all delayed writes to the USB stick is flushed out – as before, wait for the prompt to re-appear. - Remove the USB stick from the PC (it is not mounted so it is safe just to remove it physically), and close the terminal on the PC – it will not be required any more so you can shut it down if you wish.
NOTE
The creation of the USB boot drive was done on a Linux PC in the above example. You can, however, use a Windows or Macintosh PC to create the USB boot drive. It is highly recommended that you use the ‘Win32 Disk Imager’ utility on Windows PC or the ‘dd’ command from a terminal on Macintosh PC to copy the iso images downloaded from the Debian web site, to the USB stick. Please do not use any other utilities for creating the USB boot drive.
STEP 2: Booting The PC On Which Debian Is To Be Installed
On the PC that the Debian Linux OS will be installed, plug in the USB boot drive and power it on. Press the Boot Menu function key (eg, F12 for Gigabyte, or F8 for Asus motherboards used by the PC) after the POST beep. At the Boot Menu, select the USB drive with ‘UEFI’ as part of it’s name, and press the ‘Enter’ key.
NOTE
If you have set the PC’s firmware (or BIOS) for both UEFI and legacy boot, and if you did not press the Boot Menu function key to enter the Boot Menu and the main HDD or SDD is blank, the PC will boot up using UEFI from the USB drive.
Wait until the PC has finished booting – the Debian Install UEFI menu should appear. Select ‘Install’ or ‘Graphical Install’ (if it is not already selected) followed by the ‘Enter’ key. The screenshots that you see from now on was produced by the ‘Graphical Install’ method – which was the only one provided by Debian for capturing screens during the installation. It is because of this that the ‘Graphical Install’ method is highly recommended by the author.
You should see the first of the installer screen – skip the following paragraphs for the special Note, and go directly to step (3). If you do not, and ended up with a black (or blank) screen, then you need to press the PC’s reset key and follow the instructions below.
NOTE – Special Instructions to Solve Black Screen Problem
The steps outlined below are for those who get a black (or blank) screen when booting up. For those curious as to why you get the ‘black screen of death’ (as it is affectionately known amongst computer enthusiast) the reason can be summoned up in one word – driver. The video card you are using do not have any Linux driver – probably because it so brand new on the market or because it is so old that it is no longer supported by Linux. Also, Debian has a philosophy of using open-source drivers as opposed to proprietary drivers – which leaves us users with problems (as usual with philosophical issues). There could be other reasons, but the main thing is how to boot up the PC so that you can install Debian Linux. Just follow the steps outlined below.
- Power up you PC and press the Boot Menu function key after the POST beep. Select the USB drive with ‘UEFI’ as part of the name, and press the ‘Enter’ key.
- Wait until the PC has finished booting – the Debian Install UEFI menu should appear.
- Select ‘Install’ or ‘Graphical Install’ (this one is recommended) if it is not already selected.
- Press the ‘e’ key in order to edit the boot parameters which you will see displayed on the screen. Place the cursor on the line that starts with ‘linux’, then move the cursor after the last item on the line, which should be ‘quite’ followed by a space.
- Type the following characters (without the quotes) ‘nomodeset’. Then press the ‘F10’ key and the PC will start booting.
STEP 3: Installing Debian – Part 1
When booting is completed, you will see the first item for the installer – which is the language selection. Make your selection and press the ‘Enter’ key (or click on the ‘Continue’ button on a graphical install). The following are the items which will appear during the install process:
- Language selection (I selected English)
- Location selection (I an located in Malaysia so I had to select ‘Other’, ‘Asia’ and ‘Malaysia’ in my case).
- Locales selection (since there are no locales for my choice of language and country, I selected United States – en_US.UTF-8 instead).
- Keymap selection (I selected the American English type keyboard).


STEP 4: Installing Debian – Part 2
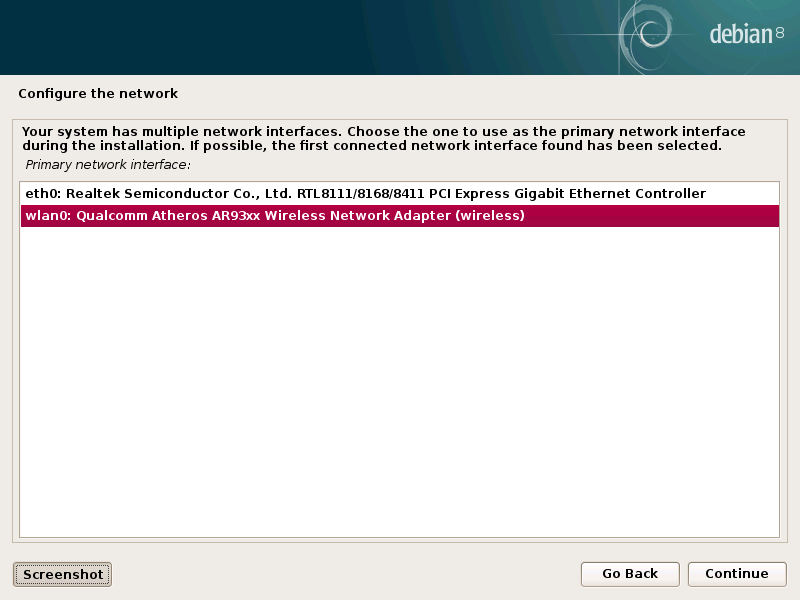
When the above is done, the installer will try to configure the hardware, copy some packages from the USB drive, and then try to set up the network. If you have multiple network connections, you will be asked to select the one to be used during installation. Note that you must get a working network connection to the Internet before you can proceed further, because you are using the ‘netinst’ installer.

The installer will then try to configure the selected network connection. If the connection is successfully set up, it will say so – you can skip the paragraphs below and proceed to the STEP 5.
If the installer is not able to set up the network, then go back and select the other network connection. You may see the screen as shown below, where attempt to connect via DHCP failed.

NOTE
One peculiarity of installing Debian Jessie on a Realtek-chipset motherboard, is that no matter what I do during install, I was not able to connect to the Internet. Even with the correct firmware loaded, the OS will still refuse to connect to the Ethernet LAN via DHCP. Why this was so is puzzling because at the end of the installation and when the PC was re-started, the Ethernet LAN connection worked flawlessly via DHCP!
If you do get the screen shown above, it still may be possible to connect to Ethernet LAN (and the Internet), but NOT via DHCP. You have to know your router’s IP address, your PC’s IP address and configure the network connection manually. If you do seen the screen as shown above, either press the ‘Enter’ key or click on the ‘Continue’ button and select ‘Configure network manually’ at the next screen (see below)

The you have to enter the information such as IP address, netmask, gateway address, and name server address (see below)


If you are not able to get the PC’s Ethernet working (your Internet connection is via the Ethernet LAN), then try using USB WiFi dongle or a PCI-E wireless adapter card on your PC.
Select the wireless network connection as shown below and continue. Then select the correct ESSID, the security type, and the correct password to connect to the wireless network.


NOTE
I tested the wireless network connection using a TP-LiNK TL-WDN4800 wireless N adapter PCI-E card on the PC. This worked perfectly without having to load any other firmware drivers and Debian was able to set up the network and connect to the Internet without any problems.
STEP 5: Installing Debian – Part 3
Then the installer will go through the following:
- Specify hostname.
- Specify domain name.
- Specify root password – note that there are multiple (2) fields that need information – use the ‘Tab’ key to move between them – not the ‘Enter’ key.
- Specify user account – enter user’s full name, account name and password.
- Partition the disk (I use entire disk).
- Select disk to partition.
- Select partition scheme (I use all files in one partition).
- Confirm and write partition to disk (notice that there are 3 partitions. #1, a bootable the EFI System Partition – shortened to ESP, #2 the main root partition and #3 the swap partition).
- Re-confirm write partition to disk after which the installer will create the partitions and format them.
- Then the base system will be installed, after which you need to configure a mirror for the package manager.
- You will be asked whether you want to participate in user survey – answer yes or no.
- Then select all the software you want installed, by pressing the ‘Space’ bar on the items you want – an ‘X’ will appear to the right of the item. Click on the ‘Continue’ key after selection and wait – the installation may take a while to finish (most of the software packages will be downloaded via the Internet and installed).
- Installation is complete as indicated – click on the ‘Continue’ key.


STEP 6: Booting Into The New Debian System
Remove the boot USB drive while the PC restarts, and you will see the GRUB menu. Wait for a while (or press the ‘Enter’ key) and the PC will continue booting.
NOTE
If your PC hangs after a few lines are displayed at the terminal, then press the PC’s reset key and let it boot up to the GRUB menu. Then press the ‘e’ key to edit the the boot parameters which you will see displayed on the screen. Place the cursor on the line that starts with ‘linux’, then move the cursor after the ‘ro’ and a space. Type the following characters (without the quotes) ‘nomodeset’. Then press the ‘F10’ key and the PC will continue booting.
Log in using your name, and you will be at the Cinnamon desktop. Note that in some cases, the screen’s resolution is set at 1024x768 on a hardware ‘laptop’ screen. Unfortunately, you cannot change the resolution of this screen. Just live with this for the time being – this will be fixed when we install the correct drivers.
A message may also pop up on-screen – this states that you are currently ‘Running in software rendering mode’. Hopefully, when we install the correct video drivers, it will get rid of the message and full video hardware acceleration will be applied.
Before installing any software on your new PC, we first need to fix the ‘sources.list’ file to avoid ‘apt-get’ from prompting you to insert the CD before proceeding. To do this, open a terminal, then execute the following commands one by one:
su -
(enter your password)
nano /etc/apt/sources.list
dpkg --add-architecture i386
aptitude update
This will invoke the ‘nano’ text editor and open the ‘sources.list’ file for editing. Make sure that a ‘#’ mark appears before the line that starts with ‘deb cdrom:.......’, and that ‘non-free’ and ‘contrib’ are present in every repository name (besides ‘main’). If not, edit the file to suit.
Save the file (Ctrl-O, Enter), and exit the nano text editor (Ctrl-X). This effectively will prevent ‘apt-get’ from bugging you to insert the CD every time you want to install something.
The last two lines are for adding the 32-bit i386 architecture to the repositories and updating them.
Next you need to determine what is the manufacturer of the video hardware you have in your PC. To do this, we will use the ‘lspci’ command from a terminal. Execute the following command on a terminal (ignore the first 2 lines if you already have the root terminal open):
su -
(enter your password)
lspci -nn | grep VGA
You should see something like ‘AMD/ATI’ or ‘NVIDIA’ or ‘Intel’ or any other manufacturer’s name in the output of the command. For this article, we will only cover the correct installation of proprietary video drivers for both AMD and NVIDIA video hardware. For instructions on other manufacturer’s video hardware, search and consult the Web for information on how to install the drivers.
STEP 7: Install ATI/AMD Video Driver
To install the AMD/ATI video drivers, follow the steps outlined below (NVIDIA video owners can skip this part and go to the next part).
- Execute the following command on a terminal (ignore the first 2 lines if you already have the root terminal open):
su -
(enter your password)
aptitude -r install linux-headers-$(uname -r) fglrx-driver
Press the ‘Enter’ key at the prompt and all the packages will be installed. Note that during driver installation you may see a message pop-up saying that ‘aticonfig --initial’ can be used to create the required configuration file. If you see this message, ignore it and click on ‘OK’ to dismiss it.
- Execute the following commands at the terminal:
mkdir /etc/X11/xorg.conf.d
echo -e ‘Section "Device"\n\tIdentifier "My GPU"\n\tDriver "fglrx"\nEndSection’ > /etc/X11/xorg.conf.d/20-fglrx.conf
Cut and paste the second command above to make things simpler. This will create the video configuration file in the created directory.
Alternatively, if you can’t cut and paste the second command above, you can execute the command:
nano /etc/X11/xorg.conf.d/20-fglrx.conf
In the nano editor file that appears, enter the following lines:
Section "Device"
Identifier "My GPU"
Driver "fglrx"
EndSection
Save the file and exit the editor.
- Close the terminal and re-start your PC. Log in and the desktop will appear with the correct resolution and full video hardware acceleration enabled. Then skip the next part and go to STEP 9 directly.
STEP 8: Install NVIDIA Video Driver
To install the Nvidia video drivers, follow the steps outlined below (AMD/ATI video owners can safely skip this part).
- Execute the following command on a terminal (ignore the first 2 lines if you already have the root terminal open):
su -
(enter your password)
aptitude -r install linux-headers-$(uname -r) nvidia-driver
Note there are a lot of additional packages that are required as per the list displayed. Press the ‘Enter’ key at the prompt and all the packages will be downloaded and installed.
During the installation process, two messages will pop up – one concerning a conflicting driver for the Nvidia card which can be solved by a re-boot. The other message simply states that the Nvidia driver is not configured yet and it needs to be enabled in the ‘xorg.conf’ file before it can be used. Simply press the ‘Enter’ key when the 2 messages appear – they will be addressed in the following steps.
- Execute the following commands at the terminal:
mkdir /etc/X11/xorg.conf.d
echo -e ‘Section "Device"\n\tIdentifier "My GPU"\n\tDriver "nvidia"\nEndSection’ > /etc/X11/xorg.conf.d/20-nvidia.conf
Cut and paste the second command above to make things simpler. This will create the video configuration file in the created directory.
Alternatively, if you can’t cut and paste the second command above, you can execute the command:
nano /etc/X11/xorg.conf.d/20-nvidia.conf
In the nano editor file that appears, enter the following lines:
Section "Device"
Identifier "My GPU"
Driver "nvidia"
EndSection
Save the file and exit the editor.
- Close the terminal and re-start your PC. Log in and the desktop will appear with the correct resolution and full video hardware acceleration enabled. To see the information on your Nvidia graphics card, click on ‘Menu’, then select ‘Administration’ and lastly click on ‘NVIDIA X Server Settings’. A window showing all the information on your Nvidia card will appear.
STEP 9: Update Debian
You now have a UEFI PC with a 64-bit Debian GNU/Linux 8.2 on it along with the correct video drivers.
NOTE
If you decide to shut down or restart the PC, you will find the process takes a fairly long time (and it will ‘beep’ at you during the process). It does seem to be ‘normal’ since this behaviour was present in several Debian PC with the same setup which I helped to install. Why this is so is something that I am still investigating.
We will now apply any updates to Debian via the Synaptic Package Manager using the following steps:
- Launch Synaptic by clicking on ‘Menu’ > ‘Administration’ > ‘Synaptic Package Manager’. Enter your password and if this is the first time you are launching Synaptic, a ‘Quick Instruction’ window will appear – read it and close the window. Resize the Synaptic window to your liking then click on the ‘Status’ button.
- Click ‘Reload’ on the Synaptic menu bar and wait for the check on the repositories to finish. If there are any upgrades, it will be shown as ‘Installed (upgradable)’ – click on it, and the main window will show the packages that can be upgraded.
- Click on the ‘Mark All Upgrades’ button. A window will pop-up for marking all the packages that will be upgraded – click on ‘Mark’ button and the window will close. Then click on the ‘Apply’ button on the Synaptic menu bar. On the window that pop-up next, click on the ‘Apply’ button. Wait for the packages to finish downloading and installed. When all the updates have been successfully applied, a window will pop-up and inform you – close it if it is not set for automatic closure. Then close Synaptic.
NOTE
You can add Synaptic (and other apps) to the panel by clicking on ‘Menu’, then move the cursor to ‘Administration’ then to the ‘Synaptic Packet Manager’. Then right-click on that item and select ‘Add to panel’ item. That item will then appear on the panel. To move or relocate that item (or any item), select that item with the mouse, and while it is selected (keep it selected), drag it anywhere within the panel. Release the item (unselect it by releasing the mouse) and it will stay in the new position.
No comments:
Post a Comment